Table of Contents
Few things are as annoying as turning on the faucet and getting hit with cold water when you were expecting a nice, hot shower. Nine times out of ten, the culprit is a water heater pilot light that’s gone out. Don’t worry—you don’t need to rush into a panic or call a professional just yet. Relighting your water heater’s pilot light is a straightforward process, and you can do it yourself with just a few simple steps.
But before you roll up your sleeves and get started, let’s make sure you know what you’re doing. Safety is key, and I’ll walk you through everything you need to know, including when it’s better to call in the pros. Ready? Let’s get your hot water flowing again.
Safety First: Don’t Skip This Step
I know you’re eager to get that hot water back, but let’s take a moment to talk about safety. Working with gas is no joke, and there are a couple of precautions you should follow before you even think about lighting anything. First off, make sure the area around your water heater is well-ventilated. If there’s gas lingering around, the last thing you want to do is light a match and accidentally cause a fire.
Always check for any gas odors before starting. If you smell gas, don’t take any risks—immediately turn off the gas supply, leave the area, and call your local gas company or a licensed HVAC professional. This is one of those “better safe than sorry” situations.
If everything smells fine and you feel confident moving forward, let’s get to work and relight a pilot light.
The Step-by-Step Guide to Relighting the Pilot Light

Now that we’ve covered safety, it’s time to relight a pilot light and get your hot water back on track. Here’s exactly what you need to do:
Step 1: Turn Off the Gas
The first step is to locate the gas control valve on your water heater. This should be a dial or knob near the bottom of the unit. Turn it to the “Off” position and give it a few minutes to allow any lingering gas to dissipate. This is crucial—lighting the pilot light too soon could be dangerous.
Step 2: Wait a Few Minutes
After turning the gas off, don’t rush to the next step. Give it at least 5 to 10 minutes for any gas fumes to clear out. Trust me, you want to err on the side of caution here.
Step 3: Find the Pilot Light Assembly
Your water heater’s pilot light assembly is usually located near the bottom of the tank. Look for a small tube leading from the gas valve to a small opening where the flame is supposed to be. This area is often referred to as the “burner compartment.” You might need a flashlight to see everything clearly, so have one handy.
Step 4: Relight the Pilot
Once you’ve located the pilot light assembly, it’s time to light it up. Most water heaters have a gas control knob that needs to be set to “Pilot.” Hold the knob in this position to start the flow of gas to the water heater pilot light.
If your water heater uses an automatic igniter (like a piezoelectric system), just press the ignition button while holding the gas control knob. If it’s an older model that requires manual lighting, you’ll need to use a long lighter or match. Place the flame near the pilot light opening while continuing to hold down the gas control knob.
Step 5: Hold the Knob
After the pilot light is lit, keep holding the gas control knob for about 30 seconds. This allows the thermocouple (a safety device that monitors the pilot light) to heat up and signal the gas valve that it’s safe to stay open. If you release the knob too soon, the pilot light may go out, and you’ll have to start over.
Once you’re sure the flame is steady and the thermocouple is warmed up, you can slowly release the knob.
Step 6: Turn the Gas Back On
With the pilot light lit and holding strong, it’s time to turn the gas back on. Set the gas control knob to the “On” position, which allows gas to flow freely to the burner. After a few seconds, you should hear the burner ignite, and your water heater should start heating the water again.
If everything’s working as it should, your water heater pilot light will stay lit, and you’ll have hot water back in no time.
What If It Doesn’t Work?
If you’ve followed all the steps but the pilot light keeps going out, don’t stress—there could be a few simple reasons why. One possibility is that the thermocouple is dirty or faulty. The thermocouple is a small metal rod near the pilot light that detects whether the flame is burning. If it’s covered in soot or damaged, it may not be registering the flame, which would cause the gas valve to shut off.
Another possibility is that the gas supply itself is the problem. Check to make sure the gas valve is fully open and that your home is receiving gas. If you’re using propane, it’s worth double-checking that your tank isn’t empty.
If troubleshooting doesn’t resolve the issue, it’s probably time to call in a professional. Repeated failures to keep the pilot light lit could point to a more serious problem, like a damaged gas valve or an obstructed vent.
When to Call a Professional
Even though relighting a pilot light is usually something you can do on your own, there are definitely times when it’s best to bring in a licensed HVAC technician. Here are a few signs that it’s time to call for backup:
- You smell gas. This is a major red flag. If you notice even a faint gas odor, don’t try to relight the pilot light. Shut off the gas supply, leave your home, and contact your local gas company or HVAC professional right away.
- The pilot light won’t stay lit. If you’ve tried relighting the pilot light several times and it keeps going out, there could be an underlying issue with your thermocouple, gas valve, or even your gas supply. A professional can diagnose and fix the problem safely.
- Your water heater is older. If your unit is 10-15 years old, it may be time for a replacement rather than constant repairs. Your HVAC technician can help you figure out if it’s worth keeping or if it’s time to upgrade to a more efficient model.
You’re not comfortable doing it yourself. There’s no shame in asking for help. If the thought of working with gas makes you uneasy or if you’re just not sure you’re doing it right, give your local HVAC company a call for a professional water heater repair in Canada.
Keeping Your Water Heater in Top Shape
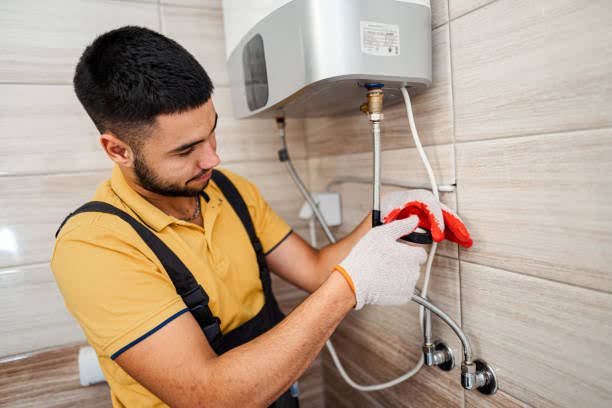
Relighting the pilot light is just one small piece of the puzzle when it comes to maintaining your water heater. To keep it running smoothly and extend its lifespan, regular maintenance is key. A little attention to these crucial areas can save you from bigger headaches down the road:
- Flush the Tank Once a Year
Over time, sediment builds up at the bottom of the tank, especially if you have hard water. This can reduce efficiency and even damage the tank. Flushing the tank at least once a year helps clear out this sediment and keeps your water heater working more efficiently. All you need is a garden hose and a bucket—just be sure to turn off the gas or electricity first! - Check the Anode Rod
The anode rod is a metal rod inside the tank that attracts corrosive minerals in the water. By “sacrificing” itself, it helps prevent the tank from rusting. Every couple of years, it’s a good idea to check the anode rod and replace it if it’s significantly worn down. A fresh anode rod can add years to your water heater’s life. - Inspect the Pressure Relief Valve
The pressure relief valve is a crucial safety feature. It releases excess pressure if the tank gets too hot or the pressure builds up too much. Test it once a year to make sure it’s working properly—just lift the lever and let some water out. If it doesn’t release water or leaks after testing, it may need to be replaced. - Monitor Water Temperature
Keeping your water heater set to around 120 degrees Fahrenheit not only prevents scalding but also reduces wear and tear on the unit. Higher temperatures can cause the tank to overheat, increasing the risk of damage and wasting energy. - Check for Leaks
Keep an eye out for any signs of water around the base of the unit. Even a small leak can indicate a larger problem brewing, such as corrosion inside the tank. Catching leaks early can prevent serious water damage and the need for a costly replacement.
By following these simple tips, you’ll keep your water heater running at peak efficiency and help avoid unexpected breakdowns. Just like with any appliance, a little preventive care goes a long way.
Conclusion
Relighting your water heater’s pilot light is a quick fix that can save you a lot of hassle — but it’s important to know your limits. If you’ve followed these steps and still can’t get the water heater pilot light to stay lit, or if you smell gas, it’s time to call in a professional. At HVAC Service Solutions, we’re always here to help. Whether it’s relighting a pilot light, servicing your water heater, or installing a new one, you can count on us to get the job done safely and efficiently.
Don’t let a cold shower ruin your day—contact us today for expert water heater services!
Frequent Asked Questions
What causes a water heater pilot light to go out?
The water heater pilot light can go out for a number of reasons, most of which are relatively common. One of the main causes is a draft or gust of wind that blows the flame out. This often happens if your water heater is located in a drafty area, such as a basement or near a door. Another reason could be a dirty or faulty thermocouple—a small device that senses when the pilot light is on and signals the gas valve to stay open. If the thermocouple gets dirty or worn out, it may incorrectly detect that the flame is out, even if it’s still burning, causing the gas valve to shut off. Low gas pressure, a clogged pilot tube, or even an issue with the gas supply itself could also cause the pilot light to go out. In some cases, it’s simply the age of the unit, as older water heaters tend to have more frequent pilot light issues.
How do I know if my pilot light is out?
There are a few signs that your water heater pilot light has gone out. The most obvious is a sudden lack of hot water. If you turn on the tap and only get cold water, there’s a good chance the pilot light has gone out. Another indication is if you hear the water heater trying to ignite but don’t hear the familiar “whoosh” sound of the burner firing up. Some water heaters have a small viewing window or access panel where you can visually inspect the pilot light. If you look inside and don’t see the small blue flame, it’s likely out. In addition, many modern water heaters have a warning light or error code display that will signal when the pilot light is out or there’s an issue with the gas supply.
How long should I wait after turning off the gas before relighting the pilot light?
Safety is key when relighting a pilot light, so it’s important to wait at least 5 to 10 minutes after turning off the gas supply before attempting to light it again. This allows any lingering gas to dissipate from the area around the pilot light, reducing the risk of an accidental fire or explosion. If your water heater is in a small, enclosed space, you may want to wait even longer, around 15 minutes, to ensure all the gas has cleared. It’s also a good idea to check for any strong gas odors during this time. If you still smell gas after waiting, do not attempt to light the pilot light—instead, leave the area immediately and contact a professional.
What tools do I need to relight a pilot light on my water heater?
To safely and efficiently relight your water heater’s pilot light, you don’t need much in the way of tools. In most cases, all you’ll need is a long lighter or matches to ignite the flame. If your water heater has an automatic igniter, you won’t even need that. However, it’s always a good idea to have a flashlight handy, especially if your water heater is located in a dimly lit area. Some models also have a small access panel that may require a screwdriver to open. Beyond that, there’s not much else required. Most importantly, ensure you have a safe and steady source of light for the pilot light, and if you’re ever unsure, consult your water heater’s manual or call a professional.
Why does my pilot light keep going out after I relight it?
If your pilot light keeps going out after you’ve relit it, the problem could be with the thermocouple. The thermocouple is a safety device that detects whether the pilot light is burning. If it’s dirty or faulty, it won’t correctly sense the flame, causing the gas valve to shut off even though the pilot light is lit. A clogged pilot tube is another common reason. Over time, debris can accumulate in the tube, preventing a steady flow of gas to the pilot light. Low gas pressure or an intermittent gas supply can also cause this issue. If you’re not comfortable troubleshooting or the pilot light continues to go out despite your efforts, it’s best to call an HVAC professional to inspect the system.
Is it safe to relight a pilot light by myself?
In most cases, relighting a pilot light is perfectly safe, provided you follow the proper precautions. Make sure to turn off the gas supply before starting and wait a minimum of 5 to 10 minutes to let any gas clear from the area. Always check for any gas odors before attempting to light the pilot light—if you smell gas, do not proceed. However, if you’re uncomfortable working with gas or if your water heater is older and has recurring pilot light issues, it’s always a good idea to call in a licensed HVAC technician. They can not only relight the pilot light for you but also check for any underlying problems with your system.
How often should I perform maintenance on my water heater?
Routine maintenance is essential to keep your water heater running efficiently and extend its lifespan. At a minimum, you should flush the tank once a year to remove sediment that can build up and reduce the unit’s efficiency. You’ll also want to inspect the water heater pilot light to make sure it’s functioning properly. Check the anode rod every 2-3 years and replace it if it’s corroded. Test the pressure relief valve annually, and ensure that the burner area is free of dust and debris. Regular maintenance, including making sure the pilot light is in good working condition, can help prevent unexpected breakdowns and costly repairs.
Can I prevent my pilot light from going out in the future?
While it’s impossible to guarantee that your pilot light will never go out, there are a few steps you can take to reduce the likelihood. Regular maintenance is key—keeping the thermocouple clean and ensuring the pilot light assembly is free of dust and debris can help maintain a consistent flame. If your water heater is located in a drafty area, consider installing a draft shield to prevent sudden gusts from blowing out the flame. You should also monitor your gas supply to ensure there are no issues, such as low pressure. Addressing these small issues can go a long way in preventing the pilot light from going out unexpectedly.
When should I call a professional to relight my pilot light?
Although relighting a pilot light is generally something you can handle yourself, there are times when it’s best to call in a professional. If you smell gas, don’t try to relight the pilot light—contact your local gas company or an HVAC technician immediately. If the pilot light keeps going out despite your efforts to relight it, or if you’re unsure about handling gas appliances, it’s always safer to get help. A professional can diagnose the issue, whether it’s a faulty thermocouple, gas valve problem, or something else. Additionally, if your water heater is older and has frequent issues with the pilot light, an HVAC technician can assess whether it’s time for repairs or even replacement.
Share


