


Table of Contents
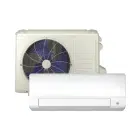
Welcome to HVAC Service Solutions’ comprehensive guide on window air conditioner installation in Canada!
Proper window AC installation is not just about staying cool; it’s about ensuring your unit’s efficiency, longevity, and safety. Cooling your space during hot summers doesn’t have to be a daunting task. In our new article, we’ll walk you through how to install a window air conditioner with seven easy steps. Ready? Let’s dive in!
Choosing the Right Window AC Size
Selecting the right-sized air conditioner window isn’t just a matter of comfort; it’s the key to efficient cooling, energy savings, and prolonging the lifespan of your unit. An undersized unit struggles to reach the desired temperature, leading to increased energy consumption and wear and tear. On the other hand, an oversized unit may cool the room too quickly, leaving you with high humidity levels and an uncomfortable environment.
Steps to Choose the Suitable Window AC Size
Step 1. Measure Your Space: Start by measuring the room where you plan to install your Window AC. Note the length, width, and height, and calculate the square footage. This measurement forms the basis of your cooling requirements.
Step 2. Assess Insulation and Sun Exposure: Consider the insulation quality and the level of sun exposure in the room. Insufficient insulation or excessive sun exposure may require a larger unit for adequate cooling.
Step 3. Calculate Cooling Capacity: Use this simple formula to calculate the required cooling capacity (in British Thermal Units or BTUs):
Cooling Capacity (BTUs) = Square Footage x 20 (for rooms with good insulation)
or x 25 (for rooms with poor insulation or high sun exposure)
Here’s a useful table to match your home size with the recommended Window AC capacity:
Home Size (Square Feet) | Recommended Window AC Capacity (BTUs) |
|---|---|
Up to 150 | 5,000 – 6,000 |
350 – 450 | 10,000 – 12,000 |
450 – 550 | 12,000 – 14,000 |
Over 550 | Consult with a Professional |
In our previous article, you can find an informative guide that will help you to choose the correct air conditioner size for your home.
Tools and Materials You'll Need to Install a Window AC

To ensure a smooth and efficient installation of your air conditioner window unit, it’s essential to have the right tools and materials on hand. We have prepared for you the list of tools and materials you will need to install a window air conditioner.
Tools:
- Screwdriver: You’ll need a screwdriver for removing and securing screws during installation. Choose a variety that includes both flathead and Phillips-head tips.
- Measuring Tape: Accurate measurements are crucial. A measuring tape helps ensure that the unit fits properly in your window.
- Level: A level ensures that your Window AC unit is installed horizontally. This is vital for proper drainage and efficient operation.
- Power Drill: If your installation requires drilling holes for brackets or additional support, a power drill will make the process quicker and more precise.
- Adjustable Wrench: This tool comes in handy for tightening nuts and bolts during the installation of support brackets or platforms.
- Utility Knife: A utility knife is useful for trimming weatherstripping and insulation materials to the correct size.
Materials:
- Support Brackets or Platform: Depending on your Window AC unit’s size and weight, you may need support brackets or a platform to ensure stability and even weight distribution. These are essential for safety and proper installation.
- Brackets and Screws: Brackets and screws are used to secure the Window AC unit in place. Ensure that they are strong and durable to hold the weight of the unit.
- Weatherstripping: Weatherstripping helps create a tight seal around the unit, preventing drafts and maintaining energy efficiency. It’s crucial for insulation.
- Foam Insulation Strips: Foam insulation strips are used to seal gaps between the Window AC unit and the window frame. Proper insulation prevents air leaks and ensures efficient cooling.
By having these tools and materials readily available, you’ll be well-prepared to tackle your Window AC installation with confidence.
Curious about the cost of air conditioner professional installation in Canada? Find the answer in our previous article.
7 Steps on How to Install a Window AC Properly

Now it’s time to install your window air conditioner. Carefully remove the unit from the box, then take out the owner’s manual and follow along as you go through the following instructions. We’ll guide you through each stage, making your window AC installation a breeze. Follow these seven steps for a smooth window air conditioner installation:
Step 1: Prepare the Window and Surrounding Area
Before you begin, clear the area around your window and make sure it’s clean and clutter-free. You’ll need a stable surface to support your Window AC unit, so check that the window sill is level and sturdy. Remove any obstructions or debris that could hinder installation.
Step 2: Install Support Brackets or Platform
For proper support, install sturdy support brackets or a platform according to the manufacturer’s guidelines. These are essential for bearing the weight of the Window AC unit. Make sure they are securely anchored to the wall and level.
Step 3: Position and Secure the AC Unit
With your support system in place, it’s time to position your Window AC unit. Carefully lift it into the window opening, ensuring it’s centered and level. Follow the manufacturer’s instructions to secure it in place, typically with screws or brackets. Connect the power cord and set up the drainage system, if required.
Step 4: Take Safety Precautions
Safety should always be a priority. Before starting, turn off power sources to the unit and the electrical circuit you’ll be working on. When handling refrigerants, wear safety gloves and goggles to protect your skin and eyes. Keep a fire extinguisher nearby as an added safety measure.
Step 5: Test and Troubleshoot
After installation, test your window AC unit to ensure it’s functioning correctly. Check the thermostat, fan settings, and cooling mode. Listen for any unusual noises or vibrations. If you encounter any issues, refer to the user manual for troubleshooting tips or consult a professional if needed.
Step 6: Ensure Proper Insulation and Sealing
To prevent air leaks and maintain energy efficiency, use weatherstripping to create a tight seal around the unit. Apply foam insulation strips to seal any gaps between the Window AC unit and the window frame. Proper insulation ensures efficient cooling and prevents drafts.
Step 7: Maintenance and Regular Cleaning
To keep your air conditioner window unit operating efficiently, follow a routine maintenance schedule. Regularly clean or replace the air filter and clean the coils. Keep the unit free from dust and debris. Additionally, consider scheduling professional AC maintenance checks for thorough inspections and cleaning.
Not sure you are able to complete these steps by yourself? Worry not! Reach out to HVAC Service Solutions for a professional air conditioner installation in Ontario and leave your HVAC worries to us.
Professional vs. DIY Installation

When it comes to Window AC installation, the choice between professional help and a DIY approach is an important one. While some homeowners may be tempted to tackle the installation themselves, it’s crucial to consider the potential risks and benefits, especially if you lack the necessary expertise.
Opting for professional installation brings several significant advantages:
Safety First: Professionals have the experience and knowledge to handle potentially hazardous tasks, such as electrical connections and refrigerant handling, with the utmost safety. Your well-being is their top priority.
Guaranteed Expertise: HVAC Service Solutions boasts a team of skilled technicians with a deep understanding of HVAC systems. Our professionals are well-versed in the intricacies of Window AC installation, ensuring every step is executed flawlessly.
Warranty Protection: Many Window AC units come with warranties that may be voided if the installation is not carried out by a certified technician. Professional installation ensures your warranty remains valid, offering peace of mind.
Efficiency and Longevity: A professionally installed unit operates at maximum efficiency, reducing energy consumption and extending its lifespan. This means lower energy bills and fewer replacements in the long run.
Customized Solutions: HVAC Service Solutions takes into account your unique needs and home specifications, providing a tailored installation that maximizes cooling efficiency.
Attempting a Window AC installation without adequate expertise can lead to various issues such as safety hazards, voided warranty, and mistakes that may result in costly repairs or even the need for a replacement unit.
When you choose HVAC Service Solutions, you’re not just investing in a cooling system; you’re investing in peace of mind, efficiency, and the safety and comfort of your home. Don’t risk a subpar installation; let our professionals handle it with the expertise and professionalism that sets us apart.
Conclusion
A well-functioning Window AC is a lifeline to comfort and coziness. Proper installation ensures that this cooling ally performs at its best, keeping your indoor environment refreshingly pleasant. By following our expert advice, you can enjoy efficient cooling, lower energy bills, and a longer lifespan for your unit.
Don’t leave your home comfort to chance. When it comes to HVAC needs, HVAC Service Solutions is your trusted partner, providing top-notch expertise and service. Contact us today, and let us keep your home cool and comfortable all year round.
Share


